Outline:
- Step 3: Controlling the Camera
- Integrate the Picamera2 library to control the Raspberry Pi camera.
- Write a function to capture images and save them.
- Update the Flask app to include a route for taking pictures.
- Test the camera control functionality.
- Step 4: Auto-Refreshing the Image in the Browser
- Add JavaScript to automatically refresh the captured image in the browser.
- Explain how the script works.
- Test the auto-refresh functionality.
Welcome back! In this part, we’ll make our Flask app even more powerful by integrating the Raspberry Pi camera and adding functionality to automatically refresh the captured images in the browser. By the end of this post, you’ll have a web app that can capture images with the Raspberry Pi camera and display them in real-time.
Step 3: Controlling the Camera
Integrate the Picamera2 Library
First, we need to integrate the Picamera2 library to control the Raspberry Pi camera. If you haven’t installed it yet, do so with the following command:
pip install picamera2Writing a Function to Capture Images
Now, let’s write a function to capture images and save them. We’ll add this functionality to our Flask app.
Update your app.py to include the camera setup and a function to capture images:
from flask import Flask, render_template, redirect, url_for
from picamera2 import Picamera2
import time

app = Flask(__name__)

# Initialize the camera
camera = Picamera2()
camera.configure(camera.create_still_configuration())
camera.start()

def take_picture(filename):
    time.sleep(2)  # Allow the camera to adjust settings
    camera.capture_file(filename)

@app.route('/')
def index():
    return render_template('index.html')

@app.route('/take-picture')
def take_new_picture():
    take_picture('static/captured_image.jpg')
    return redirect(url_for('index'))

if __name__ == '__main__':
    app.run(host='0.0.0.0', port=5000, debug=True)
Explanation of the Code
from picamera2 import Picamera2: Imports the Picamera2 library to control the Raspberry Pi camera.camera = Picamera2(): Creates an instance of the Picamera2 class.camera.configure(camera.create_still_configuration()): Configures the camera for still image capture.camera.start(): Starts the camera.def take_picture(filename): Defines a function to capture an image and save it to the specified filename.time.sleep(2): Adds a short delay to allow the camera to adjust its settings before capturing the image.camera.capture_file(filename): Captures the image and saves it to the specified file.
Updating the Flask App to Include a Route for Taking Pictures
We added a new route /take-picture that calls the take_picture function and then redirects back to the index page to display the new image.
Testing the Camera Control Functionality
Restart your Flask application
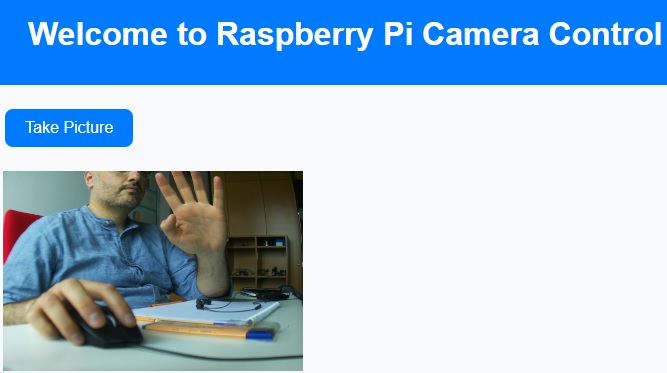
Open a web browser and navigate to http://<your-pi-ip-address>:5000/take-picture. This should capture an image and save it as captured_image.jpg in the static directory. Verify that the image was captured correctly.
Step 4: Auto-Refreshing the Image in the Browser
Adding JavaScript to Automatically Refresh the Captured Image
To see the latest captured image without refreshing the entire page, we can use JavaScript to automatically refresh the image.
Update your index.html to include the following JavaScript:
<html>
<head>
    <title>Raspberry Pi Camera App</title>
</head>
<body>
    <h1>Raspberry Pi Camera</h1>
    <img id="cameraImage" src="{{ url_for('static', filename='captured_image.jpg') }}" alt="Captured Image" width="640" height="480">
    <button onclick="location.href='/take-picture'">Capture Image</button>

    <script>
        function updateImage() {
            var img = document.getElementById('cameraImage');
            img.src = img.src.split("?")[0] + "?" + new Date().getTime();
        }
        setInterval(updateImage, 5000);  // Refresh the image every 5 seconds
    </script>
</body>
</html>
Explanation of the JavaScript
document.getElementById('cameraImage'): Selects the image element with the IDcameraImage.img.src.split("?")[0] + "?" + new Date().getTime(): Updates the image source to include a unique timestamp, forcing the browser to reload the image.setInterval(updateImage, 5000): Sets an interval to call theupdateImagefunction every 5 seconds.
Testing the Auto-Refresh Functionality
Restart your Flask application:
python3 app.pyOpen a web browser and navigate to http://<your-pi-ip-address>:5000. Click the „Capture Image“ button to take a new picture. The image should update automatically every 5 seconds to show the latest captured image.
Wrapping Up
Fantastic job! You’ve now added camera control to your Flask app and implemented automatic image refreshing. This is a significant step towards creating a user-friendly interface for controlling the Raspberry Pi camera. In the next part, we’ll add more advanced features, such as adjusting camera parameters and enhancing the user interface.
Stay tuned and happy coding!
That’s it for Part 3. Continue experimenting and refining your Flask app. In the next part, we’ll dive into more advanced features and enhancements.
Schreibe einen Kommentar