Outline:
- Step 5: Adding User Inputs for Camera Settings
- Create HTML form elements for user inputs (e.g., exposure time).
- Update the Flask app to handle these inputs and adjust camera settings accordingly.
- Test the functionality to ensure the camera responds to user inputs.
- Step 6: Implementing Image Processing Features
- Discuss potential image processing features (e.g., filters, adjustments).
- Integrate basic image processing capabilities using a library like OpenCV.
- Update the Flask app to include routes for processing images.
- Test the image processing features.
Welcome back! In this part, we’ll make our Flask app even more interactive by allowing users to adjust camera settings and adding some basic image processing capabilities. This will give users more control over the images they capture and provide tools to enhance those images directly within the web app.
Step 5: Adding User Inputs for Camera Settings
Creating HTML Form Elements for User Inputs
First, let’s create HTML form elements that allow users to input camera settings, such as exposure time. We’ll add these elements to our index.html:
<!DOCTYPE html>
<html>
<head>
<title>Raspberry Pi Camera App</title>
</head>
<body>
<h1>Raspberry Pi Camera</h1>
<form action="/set-parameters" method="POST">
<label for="exposure_time">Exposure Time (ms):</label>
<input type="number" id="exposure_time" name="exposure_time" min="0" step="100">
<input type="submit" value="Set Parameters">
</form>
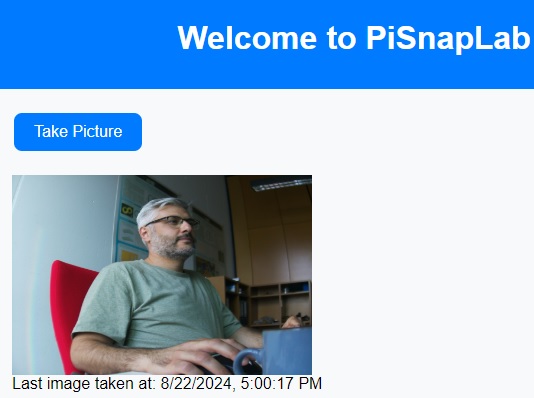
<img id="cameraImage" src="{{ url_for('static', filename='captured_image.jpg') }}" alt="Captured Image" width="640" height="480">
<button onclick="location.href='/take-picture'">Capture Image</button>
<script>
function updateImage() {
var img = document.getElementById('cameraImage');
img.src = img.src.split("?")[0] + "?" + new Date().getTime();
}
setInterval(updateImage, 5000); // Refresh the image every 5 seconds
</script>
</body>
</html>Updating the Flask App to Handle User Inputs
Next, we’ll update the Flask app to handle the user inputs and adjust the camera settings accordingly. Update your app.py:
from flask import Flask, render_template, request, redirect, url_for
from picamera2 import Picamera2
import time

app = Flask(__name__)

# Initialize the camera
camera = Picamera2()
camera.configure(camera.create_still_configuration())
camera.start()

def take_picture(filename):
    time.sleep(2)  # Allow the camera to adjust settings
    camera.capture_file(filename)

@app.route('/')
def index():
    return render_template('index.html')

@app.route('/take-picture')
def take_new_picture():
    take_picture('static/captured_image.jpg')
    return redirect(url_for('index'))

@app.route('/set-parameters', methods=['POST'])
def set_parameters():
    exposure_time = request.form.get('exposure_time')
    if exposure_time:
        camera.set_controls({"ExposureTime": int(exposure_time)})
    return redirect(url_for('index'))

if __name__ == '__main__':
    app.run(host='0.0.0.0', port=5000, debug=True)
Explanation of the Code
<form action="/set-parameters" method="POST">: Defines a form that sends a POST request to the/set-parametersroute.<input type="number" id="exposure_time" name="exposure_time" min="0" step="100">: An input field for the user to specify the exposure time.request.form.get('exposure_time'): Retrieves the user input from the form.camera.set_controls({"ExposureTime": int(exposure_time)}): Adjusts the camera’s exposure time based on user input.
Testing the Functionality
Restart your Flask application:
python3 app.pyOpen a web browser and navigate to http://<your-pi-ip-address>:5000. Enter a value in the exposure time field, click „Set Parameters“, and then capture an image. Verify that the camera adjusts the exposure time accordingly.
Step 6: Implementing Image Processing Features
Discussing Potential Image Processing Features
Before diving into the implementation, let’s discuss some basic image processing features we can add:
- Applying filters (e.g., grayscale, sepia)
- Adjusting brightness and contrast
- Cropping and resizing images
We’ll use the OpenCV library for these tasks.
Integrating Basic Image Processing Capabilities
First, install OpenCV if you haven’t already:
pip install opencv-pythonNext, we’ll update our Flask app to include basic image processing. We’ll add a route to apply a grayscale filter to the captured image.
Update your app.py:
from flask import Flask, render_template, request, redirect, url_for
from picamera2 import Picamera2
import time
import cv2

app = Flask(__name__)

# Initialize the camera
camera = Picamera2()
camera.configure(camera.create_still_configuration())
camera.start()

def take_picture(filename):
    time.sleep(2)  # Allow the camera to adjust settings
    camera.capture_file(filename)

def apply_grayscale_filter(image_path):
    image = cv2.imread(image_path)
    gray_image = cv2.cvtColor(image, cv2.COLOR_BGR2GRAY)
    cv2.imwrite(image_path, gray_image)

@app.route('/')
def index():
    return render_template('index.html')

@app.route('/take-picture')
def take_new_picture():
    take_picture('static/captured_image.jpg')
    return redirect(url_for('index'))

@app.route('/set-parameters', methods=['POST'])
def set_parameters():
    exposure_time = request.form.get('exposure_time')
    if exposure_time:
        camera.set_controls({"ExposureTime": int(exposure_time)})
    return redirect(url_for('index'))

@app.route('/apply-filter')
def apply_filter():
    apply_grayscale_filter('static/captured_image.jpg')
    return redirect(url_for('index'))

if __name__ == '__main__':
    app.run(host='0.0.0.0', port=5000, debug=True)
Update your index.html to include a button for applying the grayscale filter:
<!DOCTYPE html>
<html>
<head>
    <title>Raspberry Pi Camera App</title>
</head>
<body>
    <h1>Raspberry Pi Camera</h1>
    <form action="/set-parameters" method="POST">
        <label for="exposure_time">Exposure Time (ms):</label>
        <input type="number" id="exposure_time" name="exposure_time" min="0" step="100">
        <input type="submit" value="Set Parameters">
    </form>
    <img id="cameraImage" src="{{ url_for('static', filename='captured_image.jpg') }}" alt="Captured Image" width="640" height="480">
    <button onclick="location.href='/take-picture'">Capture Image</button>
    <button onclick="location.href='/apply-filter'">Apply Grayscale Filter</button>

    <script>
        function updateImage() {
            var img = document.getElementById('cameraImage');
            img.src = img.src.split("?")[0] + "?" + new Date().getTime();
        }
        setInterval(updateImage, 5000);  // Refresh the image every 5 seconds
    </script>
</body>
</html>
Explanation of the Code
import cv2: Imports the OpenCV library.def apply_grayscale_filter(image_path): Defines a function to apply a grayscale filter to the image.cv2.cvtColor(image, cv2.COLOR_BGR2GRAY): Converts the image to grayscale.cv2.imwrite(image_path, gray_image): Saves the processed image.<button onclick="location.href='/apply-filter'">Apply Grayscale Filter</button>: Adds a button to apply the grayscale filter.
Testing the Image Processing Features
Restart your Flask application:
python3 app.pyOpen a web browser and navigate to http://<your-pi-ip-address>:5000. Capture an image and then click the „Apply Grayscale Filter“ button. Verify that the image is processed and displayed in grayscale.
Wrapping Up
Awesome work! You’ve now added functionality to adjust camera settings through user inputs and integrated basic image processing features. This significantly enhances the capabilities of your Flask app, making it more versatile and user-friendly.
In the next part, we’ll explore more advanced image processing techniques and further refine the user interface. Stay tuned for more exciting features and happy coding!
That’s it for Part 4. Keep experimenting and building on these features. In the upcoming parts, we’ll continue to expand the app’s functionality and make it even more powerful.
Schreibe einen Kommentar